Settings CRO Mobile
1. Types of buttons
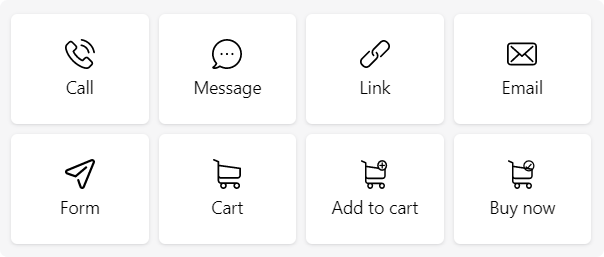
There are 8 different types of buttons you can add to your CRO set
- Call
- Message
- Link (URL)
- Form
- Cart
- Add to Cart
- Buy Now
- Cart, Add to cart and Buy now button can only be created once
- Add to cart and Buy now button can only be created on product page
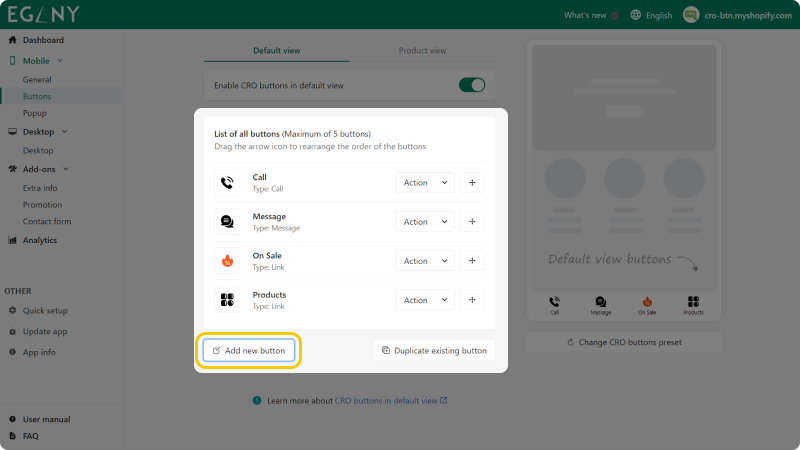
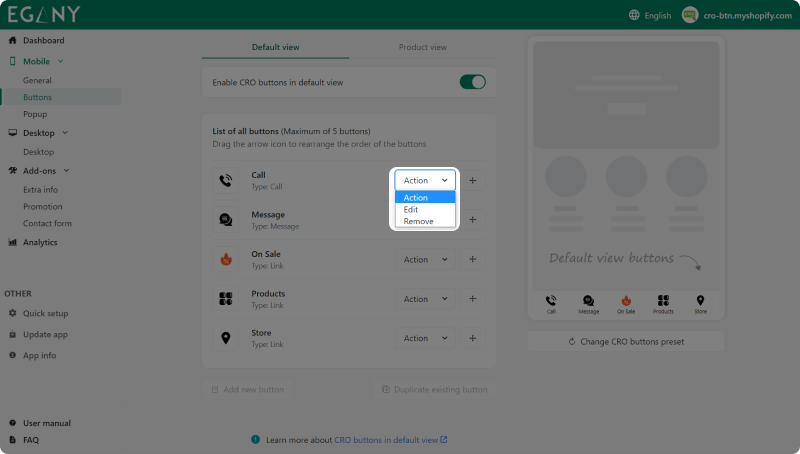
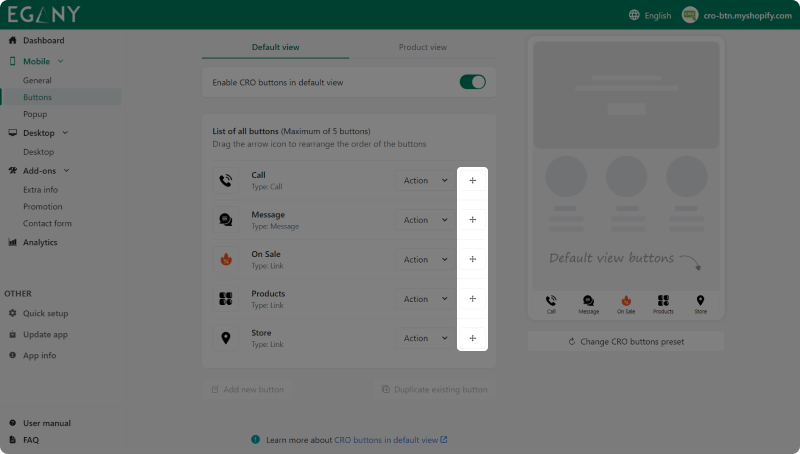
2. Setting actions
Add new button
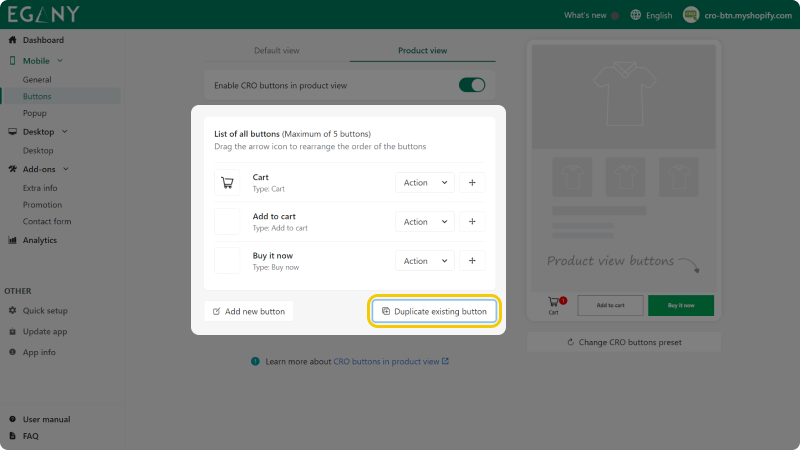
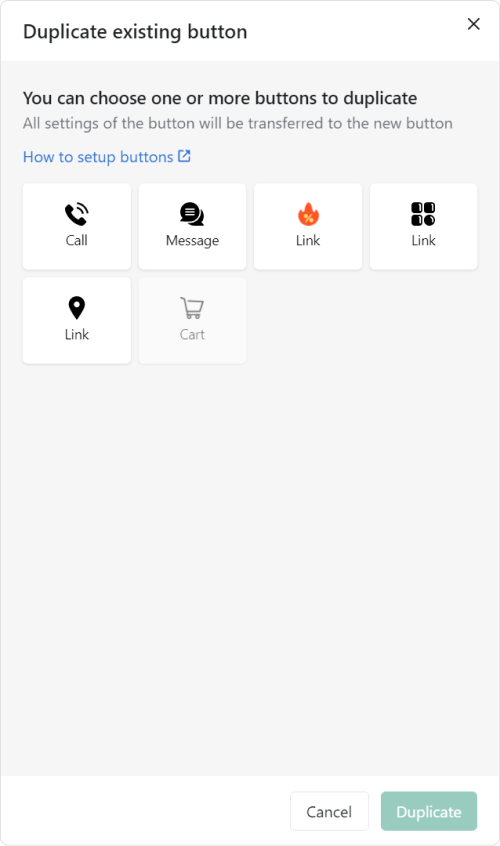
Duplicate existing button
A list of buttons that can be cloned will appear as shown below. Select one or more buttons and click Duplicate
Edit or remove button
Reorder buttons
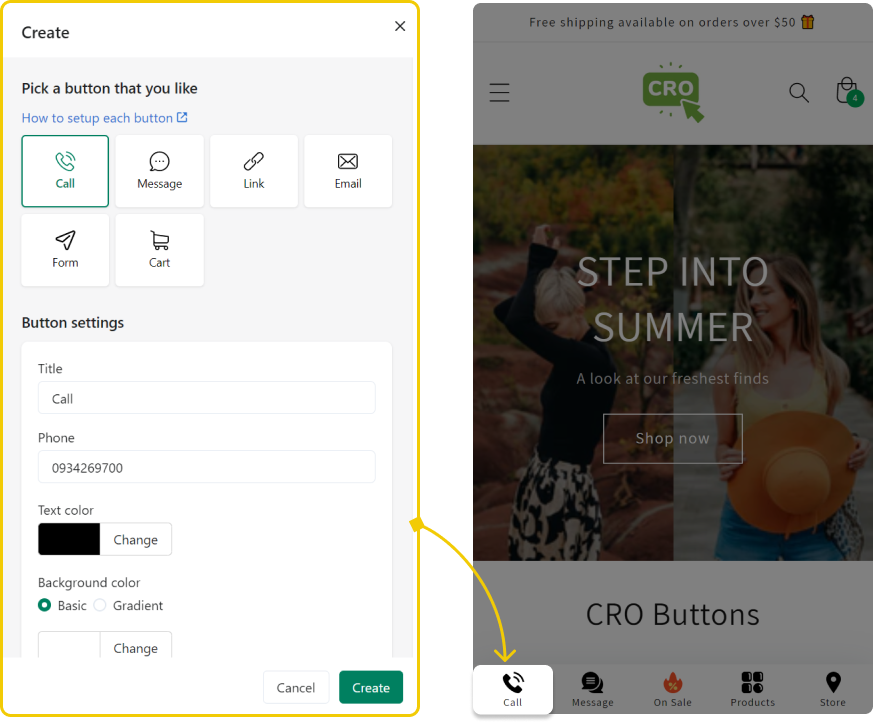
3. How to create each type of button
Call
Go to Mobile > Buttons > Default view/Product view > Add New Button > Select Call Button Type
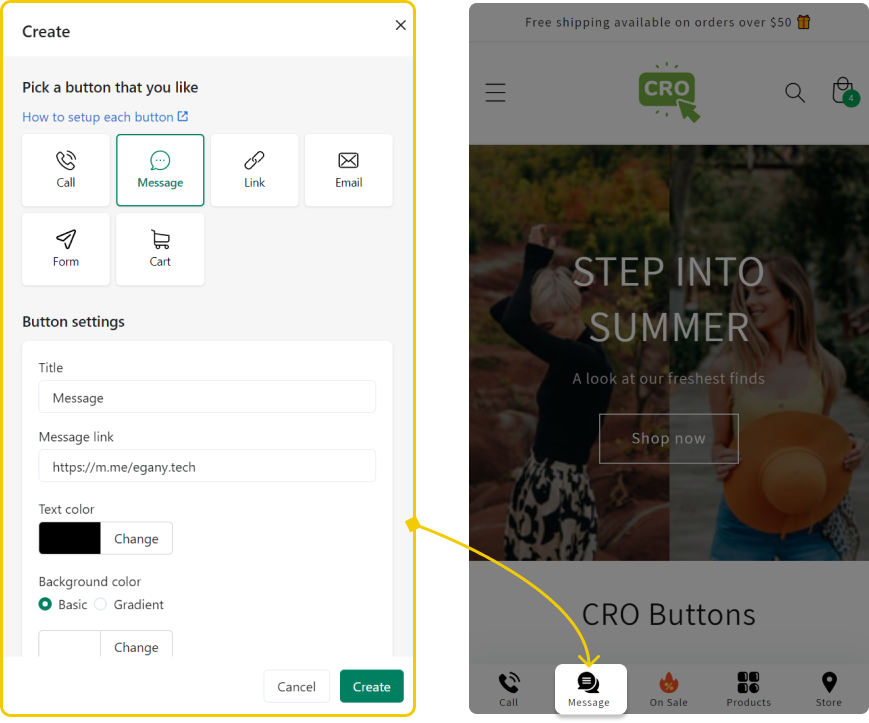
Message
Go to Mobile > Buttons > Default view/Product view > Add New Button > Select Message Button Type
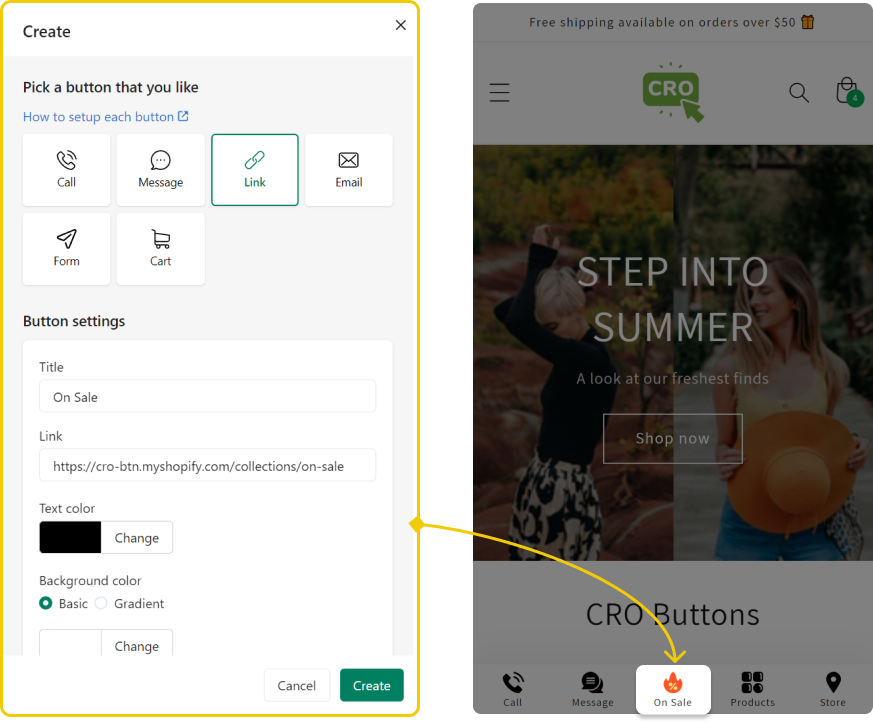
Link
Go to Mobile > Buttons > Default view/Product view > Add New Button > Select Link Button Type
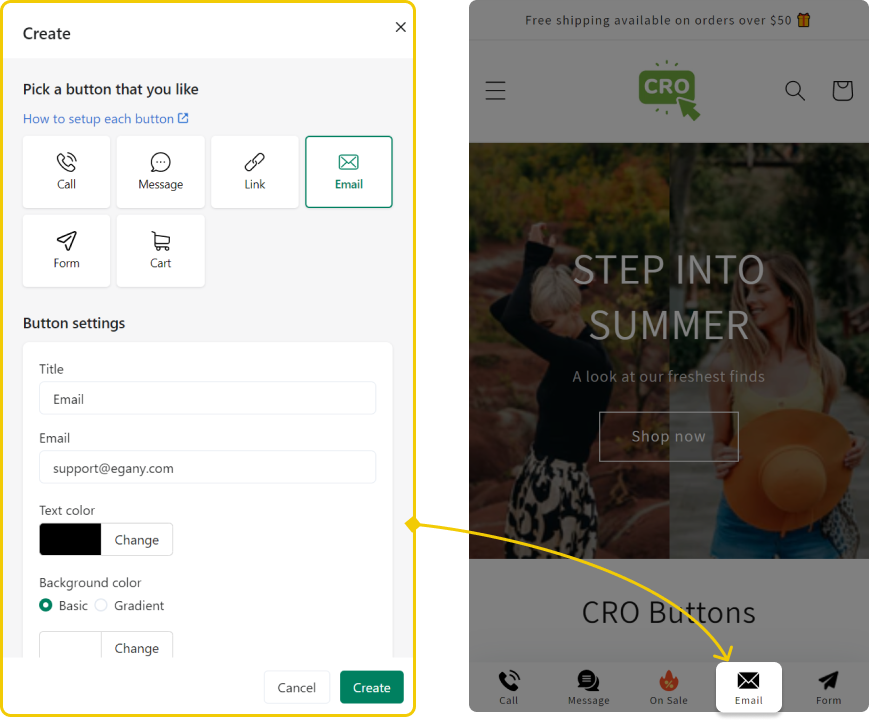
Email
Go to Mobile > Buttons > Default view/Product view > Add New Button > Select Email Button Type
Form
Go to Mobile > Buttons > Default view/Product view > Add New Button > Select Form Button Type
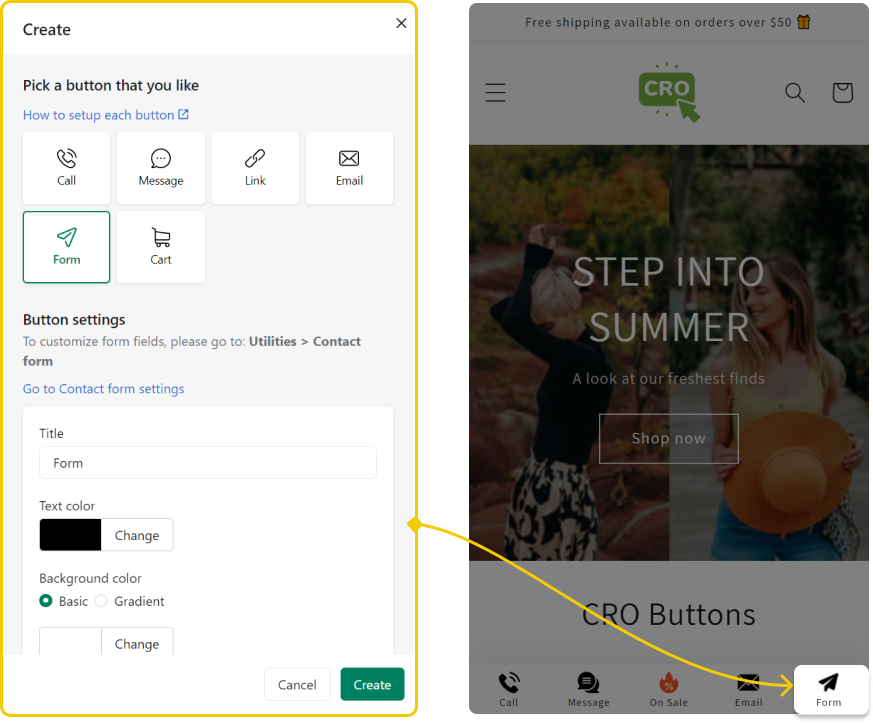
After adding a contact button to CRO Mobile, you can customize which field is displayed on the form and other options related to the form.
Go to Settings contact form for CRO buttons for detailed instructions
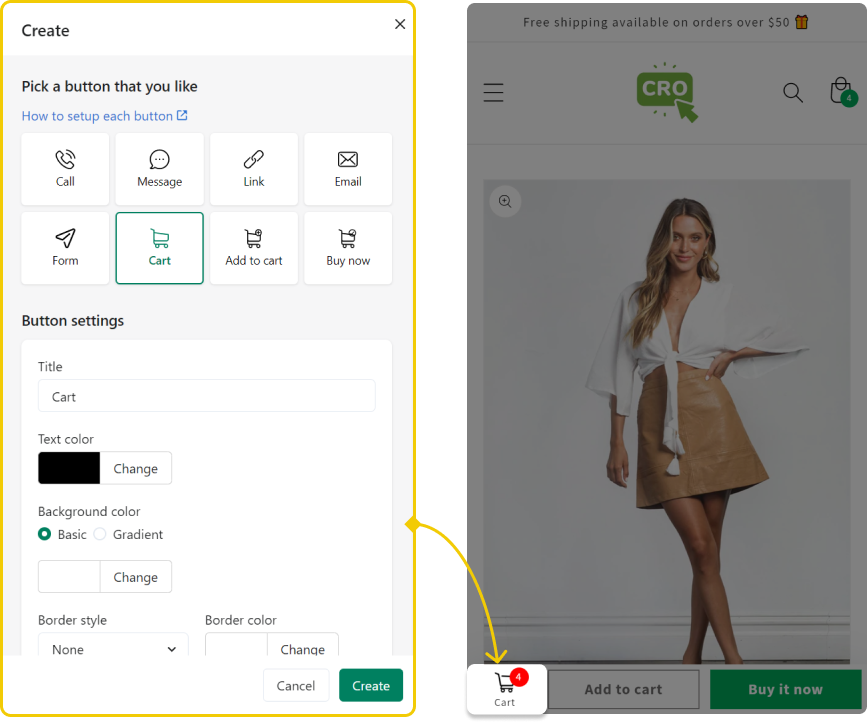
Cart
Go to Mobile > Buttons > Default view/Product view > Add New Button > Select Cart Button Type
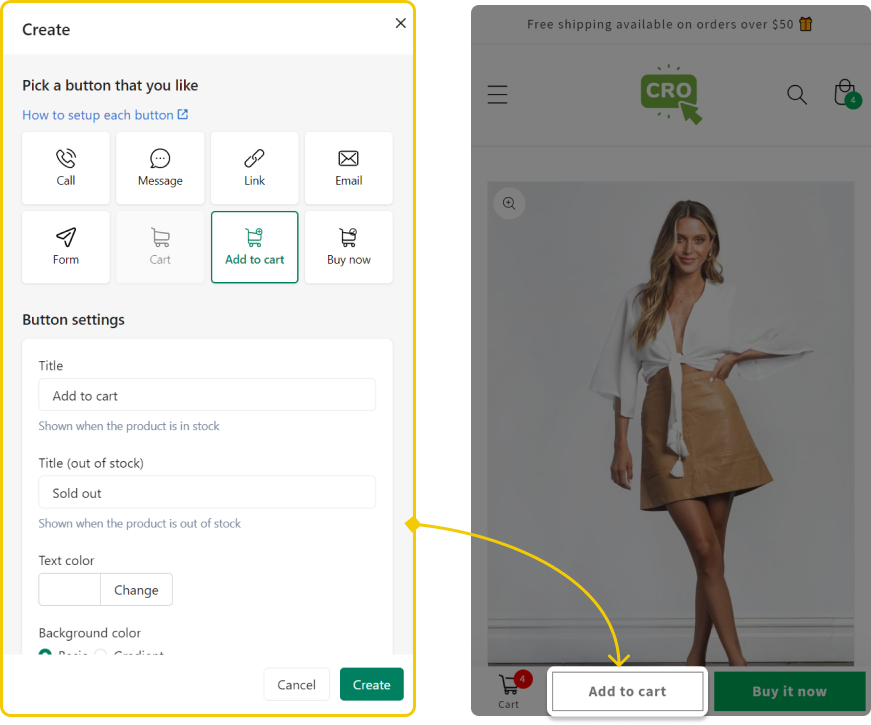
Add to cart
Go to Mobile > Buttons > Default view/Product view > Add New Button > Select Add to cart Button Type
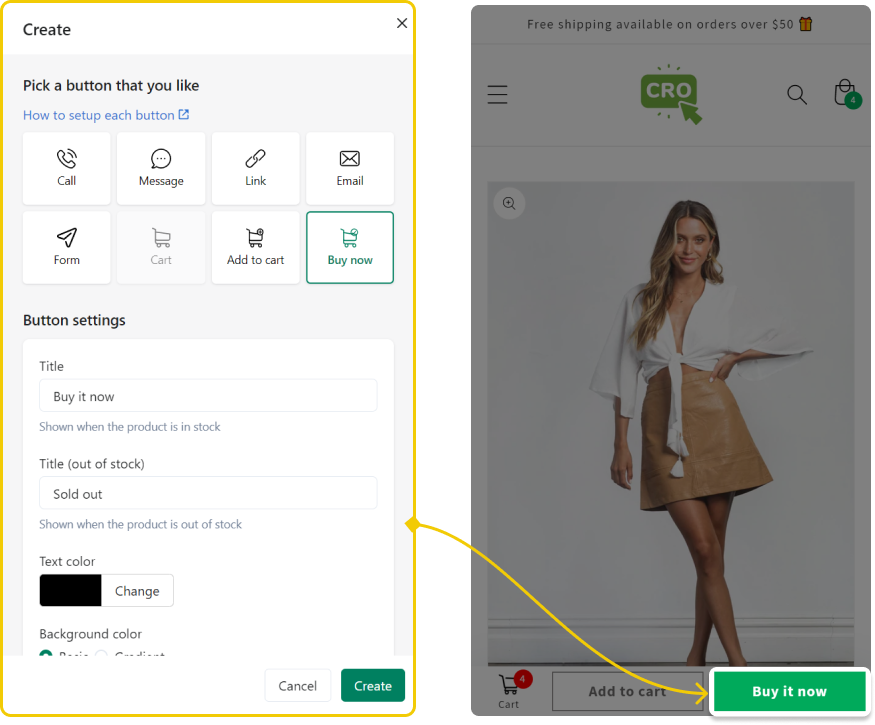
Buy now
Go to Mobile > Buttons > Default view/Product view > Add New Button > Select Buy now Button Type
If the uploaded icon has .svg extension (vector), the color of the icon will match the text color of the button
If the uploaded icon has .png or .jpg extension (image file), the color of the icon will not change

After following the tutorial above, you have successfully set up buttons. If you have any questions during the process, please contact [email protected]